Cloud Foundry Plugin
Introduction
The Cloud Foundry Plugin transforms a CSAR to an artifact which can be deployed on the Cloud Foundry Platform. In general the following steps have to be done to transform and deploy a CSAR:
- upload CSAR with the GUI/ CLI
- select Platform CloudFoundry
- enter required Inputs
- start Transformation
- download artifact
- unzip at target location
- start deploying by executing the deploy.sh found in output/scripts/ in target artifact
Before the Transformation can start the Cloud Foundry credentials and additional properties have to be set:
CF_Instance_Username: Username of CloudFoundry user accountCF_Instance_Api: The endpoint of the providerCF_Instance_Organization: The organization of the user account which should be used for deploymentCF_Instance_Password: Password of CloudFoundry user accountCF_Instance_Space: The space of the user account which should be used for deployment
The credentials are used to get a list of services which can be used for deployment.
For more details on supported NodeTypes, the basics of Cloud Foundry, the Transformation and the created scripts, see the documents in dev/plugins/cloudFoundry. The deployment of an artifact was mainly tested with Pivotal Cloud Foundry.
Artifact
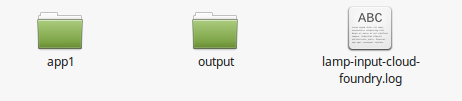
The Artifact is the result of the transformation which contains all necessary files which are needed to deploy an application on Cloud Foundry. After you open the Artifact you can see the log of the Transformation, the app folder(s) which contain your application and the output folder which contains the files for deployment. If you provide multiple applications in your CSAR the artifact will contain multiple app folders called app1, app2 and so on. To get a better understanding what applications means in the context of Cloud Foundry plugin, see section CloudFoundry application in dev/plugins/cloudFoundry/How_add_new_Node_Types.
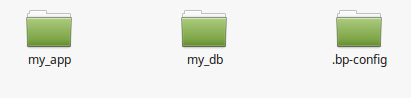
App folder: The .bp-config folder in this case contains buildpack additions for a php application, which needs some additional buildpacks.
The output folder contains a scripts folder and the files all_services.txt, manifest.yml and README.txt.

Scripts folder:

The Plugin tries to find free services available on the Cloud Foundry Platform to provide support for your modeled NodeTemplates. They can be changed to paid plans. What benefits will bring changing to a paid plan, please check your Cloud Foundry provider. You can see a list of all available services and corresponding plans in all_services.txt in the output folder.
E.g., if you want to change a database plan for the service cleardb (available on Pivotal Cloud Foundry), open deploy.sh in output/scripts/ and change cf create-service cleardb spark my_db from the free spark plan to boost, amp or shock: cf create-service cleardb shock my_db. For more information about the output folder see README.txt.
Requirements for Deployment
Before you can use the artifact to deploy, there are some requirements:
- Cloud Foundry is running on target infrastructure
- the CLI output is in English, if you are not sure use:
export LANG=en_US.UTF-8
- the Cloud Foundry CLI is installed on the local machine Debian-based Linux installation (other Systems: Install CF CLI):
wget -q -O - https://packages.cloudfoundry.org/debian/cli.cloudfoundry.org.key | sudo apt-key add -
echo "deb https://packages.cloudfoundry.org/debian stable main" | sudo tee /etc/apt/sources.list.d/cloudfoundry-cli.list
sudo apt-get update
sudo apt-get install cf-cli
- python 2.7 or newer is installed on the local machine
- If the application contains databases, there needs to be an environment variable with the name
database_hostin the CSAR service template. This is needed because there is no official node host property. For more detailed information see sectionDatabase.MySQLindev/plugins/cloudFoundry/Supported_Node_Types.
Deployment
To deploy an application, log into Cloud Foundry with the Cloud Foundry CLI (more information here).
cf login -a https://api.example.com -u username@example.com
-
Unzip at target location
-
Navigate into the /output/scripts/ folder and execute
deploy.sh:
chmod +x deploy.sh
./deploy.sh
Supported Test-CSARs
The following CSARs can be used to test the Cloud Foundry Plugin:
- lamp-input
- lamp-multinode
- lamp-noinput
- task-translator
These CSARs can be found in TOSCAna/server/src/test/resources/csars/yaml/valid
Doing a Transformation with a Test-CSAR
The Lamp-input CSAR is used in this example. Make sure you have done all the things from Requirements for Deployment. For details on how to use the GUI, see the Webapp User guide. After you upload the CSAR to the GUI and select the Cloud Foundry platform as the target you get the following inputs screen (we use Pivotal CF as endpoint here):
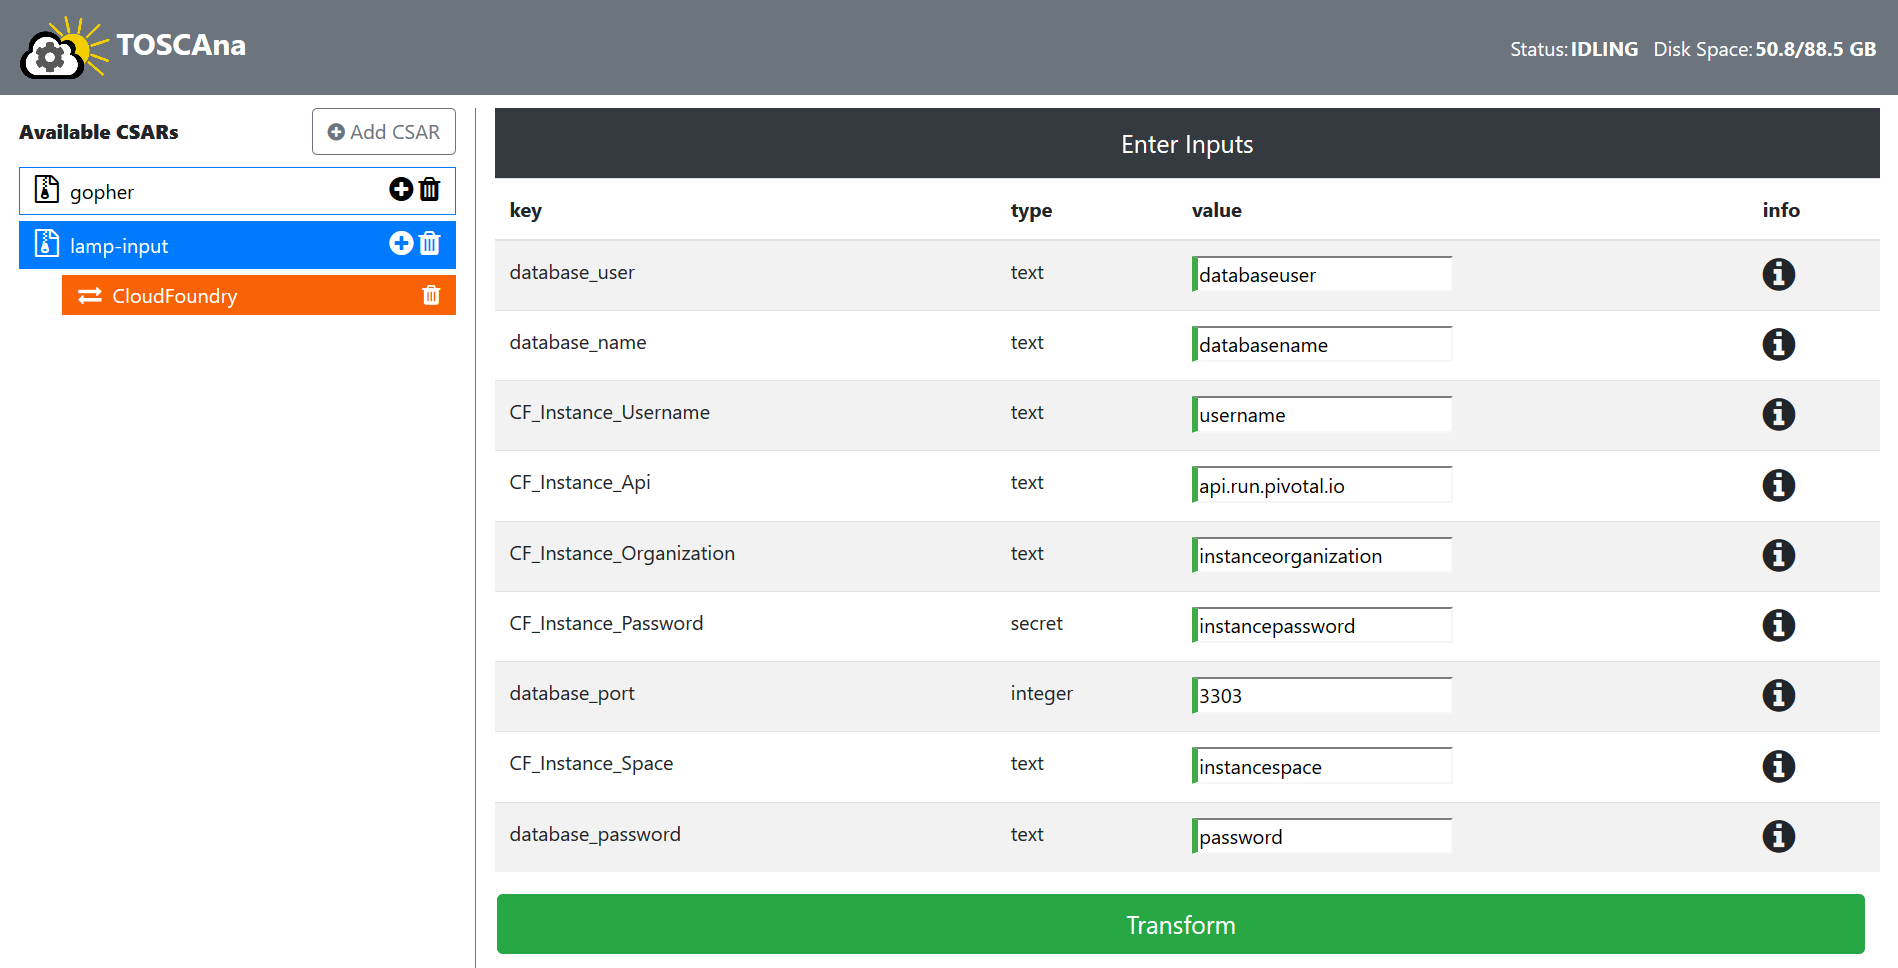
Enter the needed inputs, click on Transform, wait for the Transformation to finish and download the artifact afterwards. Now follow the steps described under Deployment and shortly after the test application should be running.